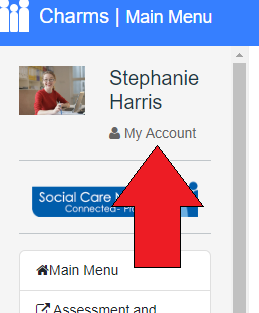
From the CHARMS main menu click on 'My Account', which is located under your name, in the top left-hand corner.
From 'My Account' you will see three tabs - User Details, Staff Details, and User Preferences.
¶ User Details
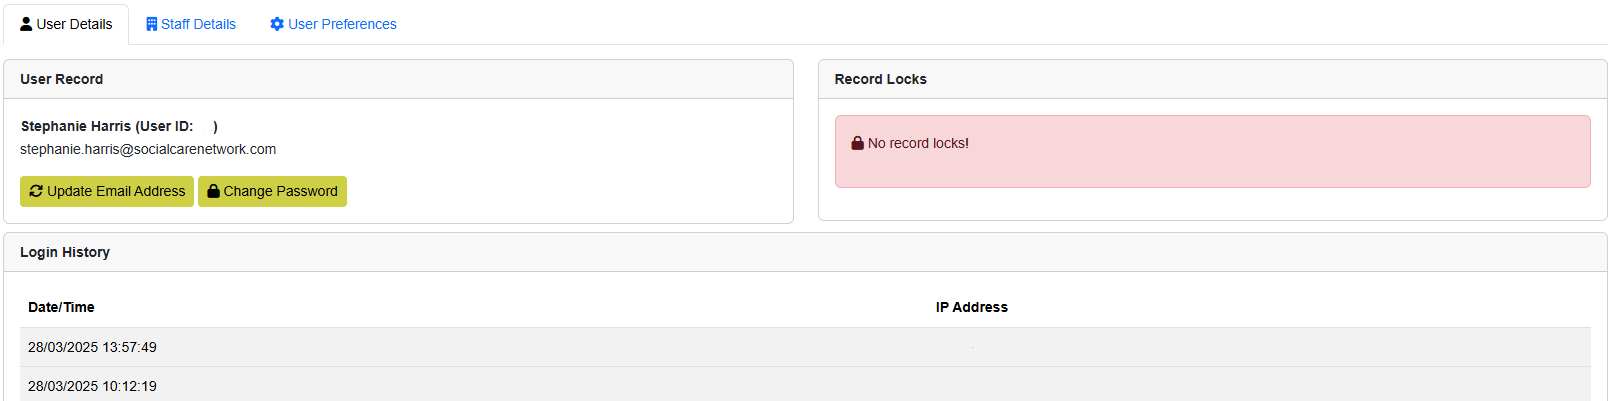
The User Record section shows information regarding the user account with which you logged into CHARMS.
It displays the current user name and associated email address with ability to change password and email address.
The Login History section shows the last ten login events as well as the IP Address from which your logged in, and the Record Locks section shows if your user account has any records currently locked for editing.
¶ Staff Details
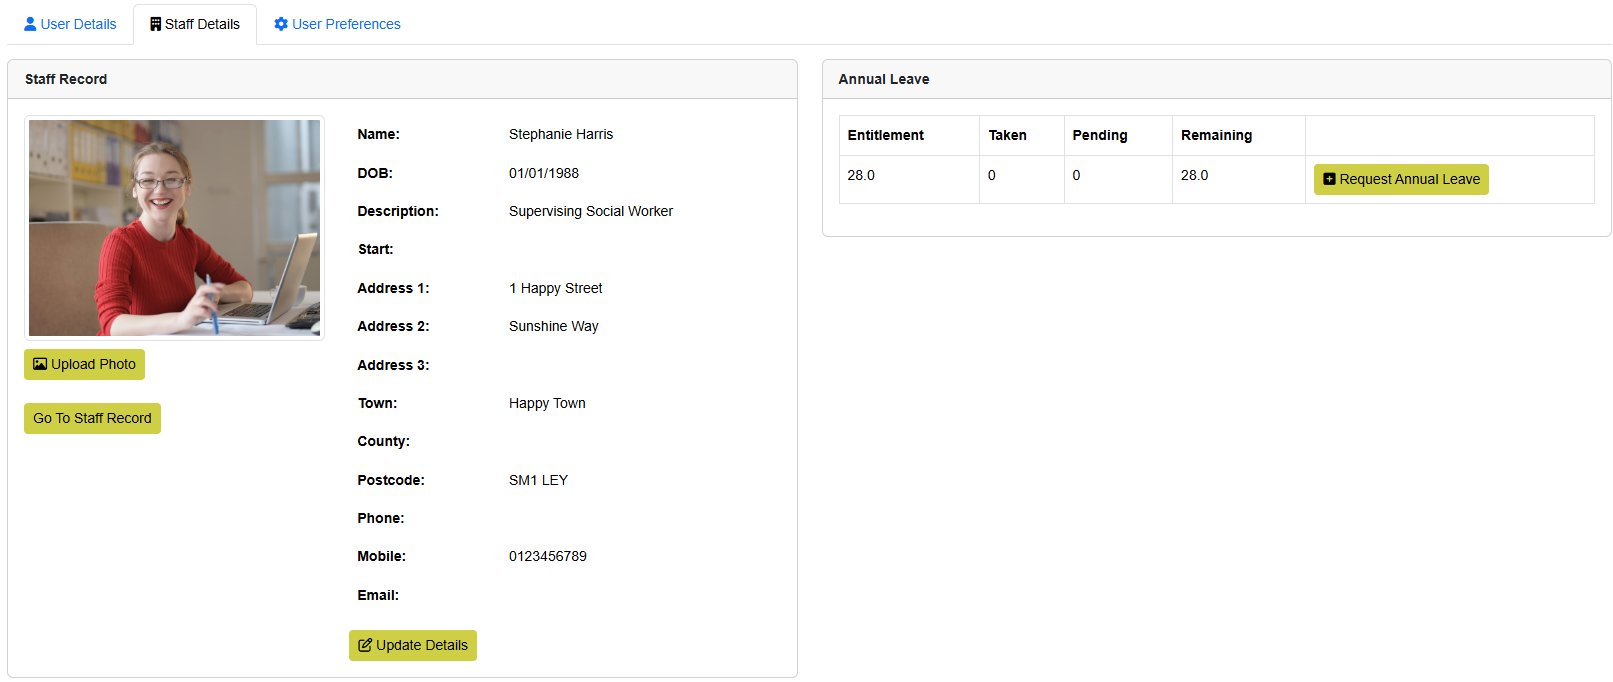
The Staff Record section shows a summary of the information held in your staff record in CHARMS, including a photograph, name, date of birth, job title, start date, contact information, and annual leave entitlement, including leave taken and leave remaining. Clicking the 'Go to Staff Record' button will take you to your staff record page.
To change the photograph on your staff record, click the Upload Photo button and choose a new image.
To request annual leave click the 'Request Annual Leave' button.
To update your personal information, such as home address and contact telephone numbers, click the Update Details button and enter any changes.
¶ User Preferences
User preferences allows you to customise your CHARMS account to your individual preferences.
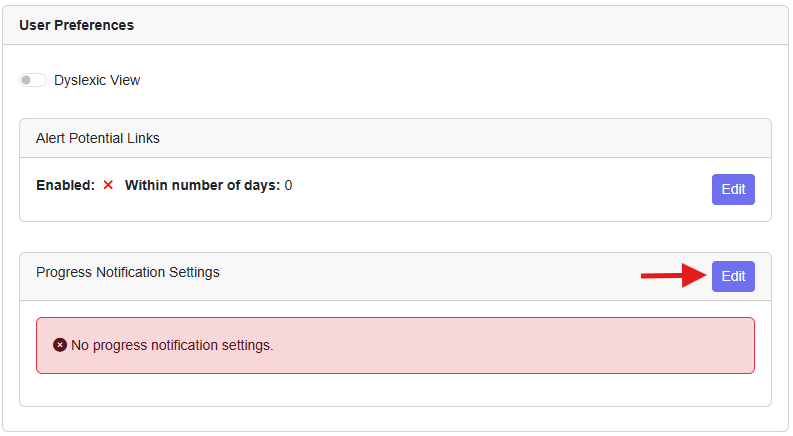
Here you have the ability to switch on Dyslexic View. When enabled, this changes the font on the system to help those with some forms of Dyslexia.
Users with the MODIFY_ALL_REFERALS permission can switch the Potential Links alert on/off and set the number of days. This will alert users to upcoming potential links on the Main Menu in the 'Alerts' widget, for the time period set.

Under User Preferences you can also find Progress Notification settings. Progress Notifications gives you the ability to set up personalised progress notifications so you’ll be alerted when important updates are added to records you are involved in. Click ‘Edit’.
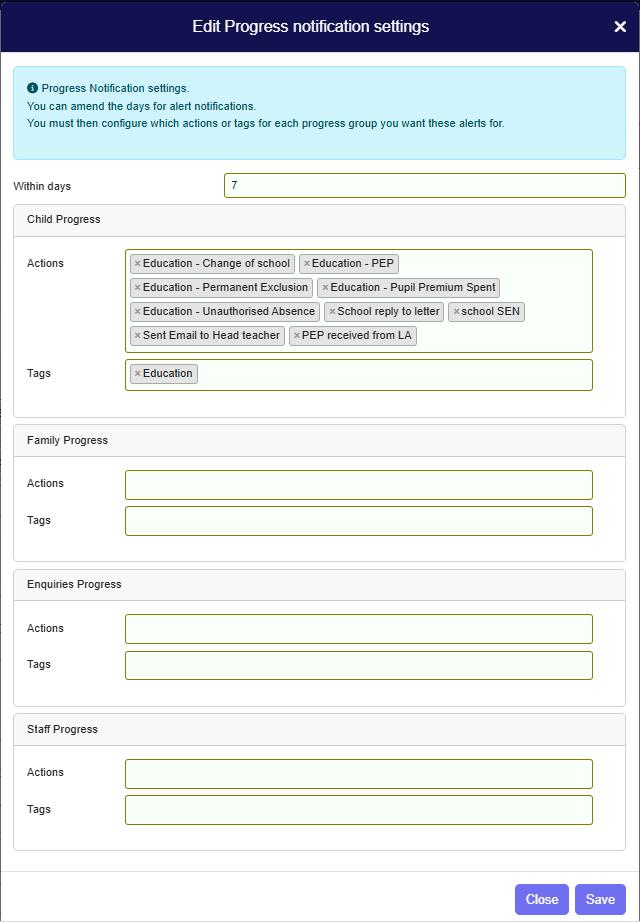
Choose which progress actions and tags you want to be notified about, as well as how many days back you want the system to check for new progress (e.g. the last 7 days).
On your Home page, within the Alerts widget, you'll see a new counter called 'Progress Notifications', showing how many new actions match your Progress Notification settings.
Clicking on the alert will open a new screen that gathers all relevant progress actions across all record types (Child, Family, PAS, Staff, etc.) into one place. Each item clearly shows record details, action taken, progress notes, who entered it, verification info, and any attached files.
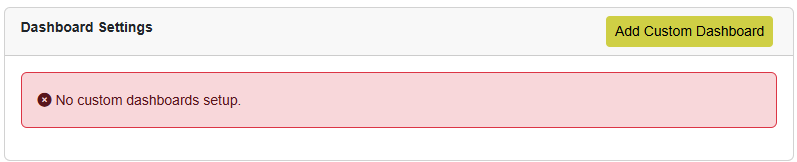
Also under User Preferences is 'Dashboard Settings'.
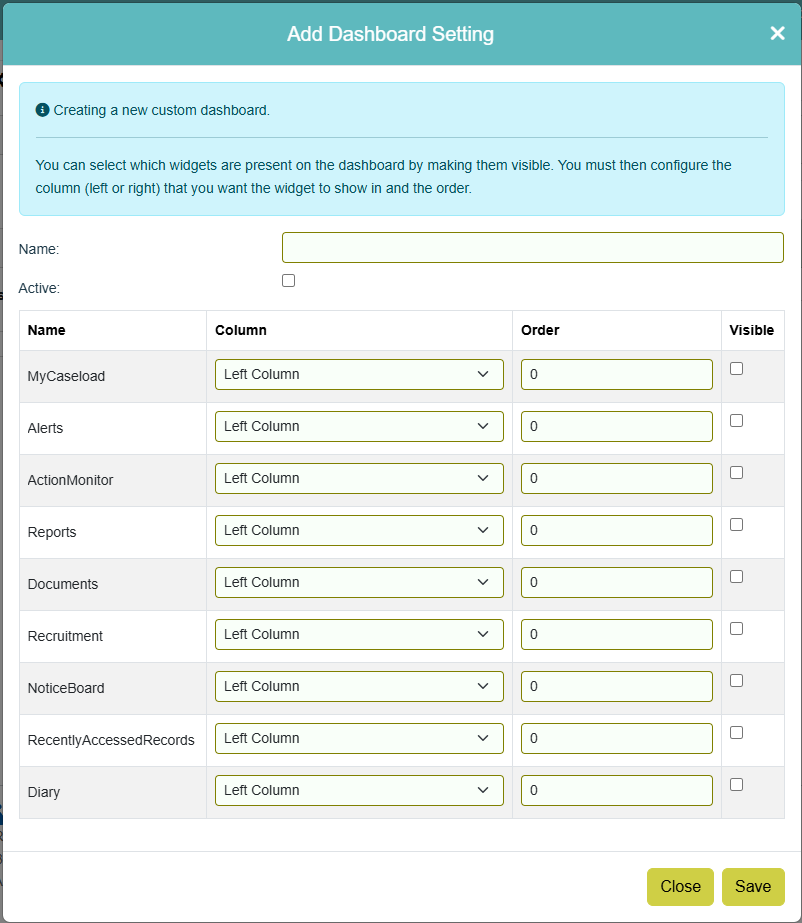
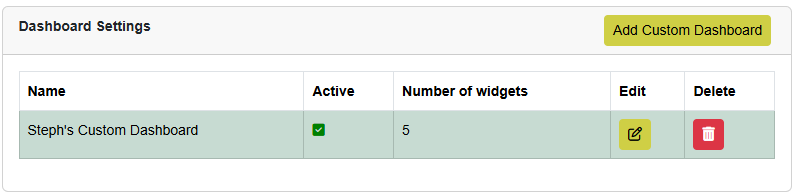
To add a new custom dashboard click the 'Add Custom Dashboard' button.
Please Note: The widgets available will depend on your permissions, e.g. for ‘Documents’ you need to have the VIEW_ALL_UPLOADED_DOCS or VIEW_OWN_UPLOADED_FILES or UPLOAD_FILE permissions. For ‘Reports’ you need to have the VIEW_REPORTS permission.
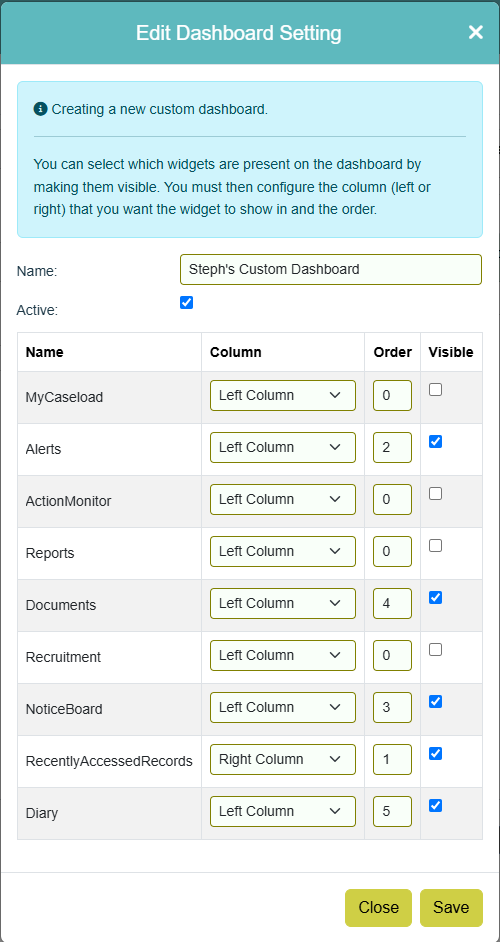
Enter a name for your custom dashboard.
Enter a tick next to ‘Active’ to show this dashboard as an option on the Main Menu.
Enter a tick under the ‘Visible’ column to show the widget on the custom dashboard.
Under ‘Column’ you can choose to output the widget in the ‘Left Column’ or ‘Right Column’
Under ‘Order’ enter the sort order that you would like the widget to be output on the Main Menu.
Click ‘Save’.
Once a custom dashboard has been set up, you will be presented with the ability to switch dashboards on the CHARMS Main Menu. The next time the user visits the Main Menu the last selected dashboard will load by default. To revert to the standard Main Menu, click the 'Reset' button next to the Dashboard drop-down.

To delete a custom dashboard, from My Account, click the 'Delete' button.
To edit a custom dashboard, click the 'Edit' button on the dashboard you wish to amend.
Make any necessary changes and click 'Save'.